Click Here To Join Our Telegram Channel for FREE daily tutorials!
80-Year-Old Master Gardener’s Free Tutorial – How To Grow Your Own Organic Food – These Amazing Tips Could Help You Live Longer And Healthier – Graphic © off-grid.info. Background image © AdobeStock 41204645 (under license)
There’s a wise old African proverb that says that every old person is also a great library…

Our elders have accumulated a lifetime of wisdom that cannot be gained any other way than through experience – and many older people’s greatest concern is that they either have nobody to whom they can pass on all that they have learned, or that “nobody will listen”.
I was lucky. My Dad grew mountains of organic fruit and veg – since before I was born. Although he will turn 82 this year, he’s still doing it, although he’s slowing down now. He curses the fact that it’s hard to pull weeds out of soil with only one good eye to gauge the distance… but he’s still out there doing it.
If you had called him a “Man of the Soil”, you wouldn’t be too far wrong. He had the instinct – and the permanently grooved hands of someone who spent many, many hours with those hands in the dirt. Nature was his wonderland and to him, it was all miraculous, a treasure. If a bee flew in the house, he would grab the honey jar, put a tiny bit on his finger and put it in front of the bee, which would climb on, and then he would take it outside.
He used to play a game called “soil to plate in under an hour”. He’s never even heard of Kirlian photography. And if you tried to tell him about some newfangled “science of life force”, he would probably say “yeah, keep taking the drugs” or some other dry wit. But come dinner time, the first step of preparing the meal… would NOT be to open the fridge, but to go out in the garden and pick what he needed. He would take it right through to the kitchen in a bucket and start preparing it there and then.
Every day we had the best, freshest veg you could possibly get your hands on…
Are you surprised he’s still going strong in his 80’s?

I managed to talk him into writing out an organic gardening tutorial to share. There’s over 50 years experience packed in here and he wrote it all out from memory, without needing to look anything up – you see, good veggies keep your mind sharp. 😉 Here it is.
(Note – he’s based in the United Kingdom, but most of this tutorial still applies in other locations in the Northern Hemisphere. Growing seasons are largely dictated by the last / first frost of the season, or when it is reasonably expected to be, so adjust accordingly.)
====================
Soil Preparation
Divide the proposed vegetable garden area into four plots for rotation purposes.
Plan areas as follows:
1. Potatoes**
2. Brassicas / Root Crops
3. Garlic, Onions & Leeks/Legumes
4. Gourds & Everything Else.

In Autumn, dig over all areas not in use for long-term crops (Kale, Broccoli, Leeks etc.), removing as far as possible all perennial weeds, e.g. bindweed roots, couch grass roots, docks, nettles, buttercups and thistles, and spread manure/compost over all plots except the one planned for root crops (fresh manure adversely affects the flavour, and can cause distortion of the roots). Worms will pull the humus underground. Winter frosts will break down larger lumps of soil. A sprinkling of pelleted chicken manure is also beneficial, if desired..
** For a smaller garden, potatoes are probably a luxury, as they take up a lot of space, and are cheap to buy.
If planning to create and use raised beds, Autumn digging should only be needed in the first year, as subsequent years should only require manure/compost to be spread on top for the worms to do the work of digging. Depending on the number of beds (minimum four), rotation can follow around the whole grid of beds each year.
Weeding
Regular hand-weeding or hoeing is highly desirable, to reduce competition for nutrients for the crops, and to aerate the soil. Always work backwards (facing the area you just worked) to ensure that the soil is not compacted by standing on it after the weeds are removed. “Soft” annual weeds can be added to the compost heap (once wilted and unlikely to re-grow), or even left in situ (but they may still self-seed).
Potatoes
Grow either First or Second Early varieties – in the Western United Kingdom, maincrop varieties are usually susceptible to blight, and if afflicted, the crop would need to be destroyed. NEVER use lime before planting potatoes. Waxy “salad”, or floury varieties can be selected according to taste. Experimenting with different varieties to find the most successful in your location may be needed. After purchasing the seed potato tubers (usually in February/March) they need to be “chitted” i.e. encouraged to start sprouting by leaving them in egg-boxes with the eyes upwards, out of direct or strong light, until it’s time to plant out, after most of the risk of frosts is over. Plant the tubers, sprouts upwards, 6 inches deep, and 18 inches apart, in rows about 2 feet apart. Earth up when the shoots are about 6 inches high. If you can’t wait, First Earlies can be picked from under the soil before they are ready to harvest, which is when the flowers are over, and the top-growth starts to wilt.. Store in PAPER sacks in the dark.
Brassicas
Grow after Potatoes In the rotation sequence, as they benefit from an application of garden lime as a top-dressing before planting out, and potatoes hate lime. All brassicas can be started off from seed in seed-trays in the greenhouse, at the time stated on the seed-packet. As seed is viable for at least 3 years, there is no need to use all of the seeds in one go, and the remainder can be safely stored in the packet indoors for future use. It’s useful to label each tray of seedlings, as they can look very similar in the early stages. When the seedlings are about 2 inches high they can be thinned out so that they have a spacing of about 1.1/2 inches apart. They must be kept moist, not wet, and do watch out for caterpillars – they can appear almost overnight, and can devastate the lot. “Large White” butterfly larvae are black/yellow speckled, and are gregarious, “Small White” caterpillars are green and mostly quite solitary. Watch out for these even after planting out, and check at least every 3 days or so, underneath as well as on top of the leaves. The seedlings can be planted out when large enough, in late summer, in rows 2 feet apart, with 2 feet between the rows. As many brassicas take a long time to mature, they will occupy their plot over the winter, so digging in the autumn is not possible. The best-laid plans etc.
Root Crops
Always use a plot that has not been recently manured. Chard and Spinach are included here, although the actual crop is the leaves – they are closely related to Beetroots. Sow thinly in a shallow drill (trench) 1 inch deep, spacing the seeds as far as possible an inch or two apart, cover with a thin layer of soil and firm along the row with the back of a rake. Once sprouted, thin to 3 inches or so apart. With Beetroots, when the roots are about the size of a small golf ball, they can be further thinned alternately, and eaten. With Chard and Spinach, thin as for Beetroots, until once the plants are 6 inches or so apart, they can be left unthinned as a pick-and-come-again.leaf crop.
Carrots are unpredictable!!! Some years, even with the best preparation, you may have to re-sow and try again. Always wait until the soil has been warmed by the sun, and is damp, but not wet. It’s best to sow a “fly-resistant” early variety in one row, with a maincrop variety alongside, in one or two rows as desired. “Fly-resistant” seeds are always fewer in number in the packet than maincrops, Make a shallow drill and GENTLY flood it before sowing the seeds. As Carrot seeds are small, it pays to mix them with a quantity of potting compost – this helps even distribution along the rows. The compost also shows how far along the row you have sown. As with Beetroots, cover the seeds with a thin layer of soil and firm with the back of a rake. When the seedlings are showing the tops of the root at the base of the leaves, they can be thinned to 1 inch apart, and eaten if wanted. Next thinnings are as for Beetroots, taking alternate roots for eating until they are about 4 inches apart. Then pick as wanted.
Legumes
Broad Beans may be sown in late autumn, but can suffer from hard frosts or rodent theft, so probably best to wait until March. The main benefit from an autumn sowing is that it potentially deters blackfly (see later) by toughening the top shoots. Sow the seeds in rows 3-4 inches deep, 4-6 inches apart, in double rows spaced at 6 inches, and 18 inches between the double rows. If the plants get very tall, they can get blown down, so it pays to provide support with string stretched between sticks along the outside of each double row. When the plants are flowering, they not only attract bees (good) but also blackfly (bad). The blackfly (an aphid) congregate at the tips of the plants and cause wilting and possibly introduce disease. There are powders and sprays to control them, but the only real organic treatment is to pinch out the tips of the plants. Messy, but effective !! Pick the beans when you can feel the beans in the pods. Save several pods for next year’s seeds, waiting until the pods are black and dry before picking , and store indoors in a dry container. Free seeds for ever!
French Beans / Runner Beans
Start off the seeds in pots in the greenhouse in April, and when about a foot tall they can be planted out. Use a wigwam of 8 x 8-foot canes, tied together at the top, each cane spaced at about 1 foot apart.and sunk into the ground. Plant the seedlings INSIDE the canes, so that they grow straight up to meet the cane,and should twine themselves without help. Occasionally, they may need to be tied in if they are blown off in strong winds, but once well established should be self-supporting. Climbing French Beans (unlike Runners) do not usually get stringy, so do not need to be picked quite as often. At the end of the season, (September-ish) leave a few pods to ripen for next year’s seeds. Wait until quite dry and then keep in the greenhouse to finish off. Store as for Broad Beans. More free seeds for ever.
Peas
Probably not really worth growing, as they are so cheap to buy nowadays, and need quite a lot of work for what you get.
Onions & Garlic
Best grown from “sets” rather than seed. Plant each set an inch or so deep, 6 inches apart, in rows a foot or so apart. Each set goes pointy end upwards – the flat end is the root!! It’s usually best to remove loose skin before planting, as otherwise worms will pull them out and you have to re-plant. Garlic is usually planted in late autumn, harvested in June/July and Onions planted in spring, and harvested in August. When the tops are wilting, lift the bulbs, and lay them on the ground to ripen in the sun. Only clear them for storage when fully dried off.
Leeks
Sow seed in a seed-tray in the greenhouse in February, only lightly covered by compost. Keep damp but not too wet. When the seedlings are about 6 inches tall, they can be planted outside, in say, late April/May. Plant in rows about 5 – 6 inches apart, in rows about 1 foot apart. It is best to trim both the leaves and the roots, so that you have a small pencil-like plant, which can easily be dropped into a hole 5-6 inches deep (use a dibber) Water in at the time of planting, so that some soil is washed on to the roots. Trimming the roots does no harm, and fresh growth will happen very quickly. Harvest as and when needed. If you wish to save seeds, remember that leeks are biennial, so that they will flower the year after being planted. They are very prolific, so only one or two flower-heads will be needed. Wait until the flowers have died right back, and keep them indoors in the dry to ripen. There is an adventive moth (the Leek Moth !!) Acrolepiopsis assectella, which has only relatively recently invaded the UK, but is spreading rapidly. The larvae do serious damage to the foliage, and eventually leave a distinctive cocoon like an open net. A sheet of fleece over the seedlings is the usual protection, and it must be kept in place until late September, when the adult moth’s second generation stops flying. There are pheromone traps available. To a lesser extent they can damage onions and garlic too.
Courgettes aka. Zucchini, Marrows and Squashes
Sow in pots in the greenhouse in April / May, and plant out at the same time as French or Runner Beans. They like a rich soil, and lots of room. Allow at least a square yard for each plant. Pick Courgettes/Zucchini when still not as big as Marrows, but leave Squashes as long as you like. They will keep indoors all winter after harvesting. All of these plants will die in drought conditions (so regular watering is needed) and will eventually perish at the first good frost.
Tomatoes and Cucumbers
Tomatoes are most easily grown as a variety of sturdy (not leggy) dark-green plants bought from a garden centre or nursery (growing from seed is OK but you only get one variety !) They do best in the greenhouse (outdoor ones are prone to potato blight). They need support, and should be tied in to canes, about 18 inches apart. A heavy crop may also need additional support. They benefit from a rich soil, and need daily watering. Remove side-shoots from the leaf-joints, and when/if the plants reach head height, remove the leading shoot. Cucumbers can be grown from seed, at the same time as courgettes etc.,and most varieties are best in the greenhouse, with regular watering and good ventilation. The fruits will go bitter if the plant dries out, or more importantly if the male flowers are left on the plant. They can easily be recognised, as they do not have a baby cucumber as part of their stem, and should be picked off daily. All of these plants will benefit from e.g. pelleted chicken manure under their roots at the time of planting.
Corn aka. Sweet Corn
Only worth growing if you have plenty of room. They are sown as seed at the same time as Courgettes etc., in April, and planted out in June/July when about 9-12 inches tall. Plant out in blocks of at least 12 plants (4 x 3) about 12 inches apart in each direction, in very rich soil, and they need regular watering.
Happy Gardening!

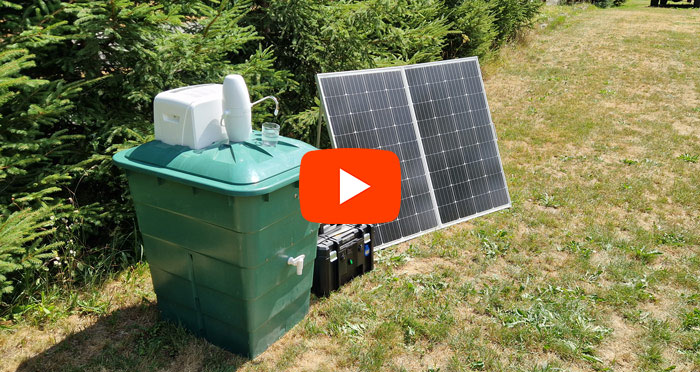
This Crazy Off Grid Device Literally Makes Drinkable Water From Fresh Air:
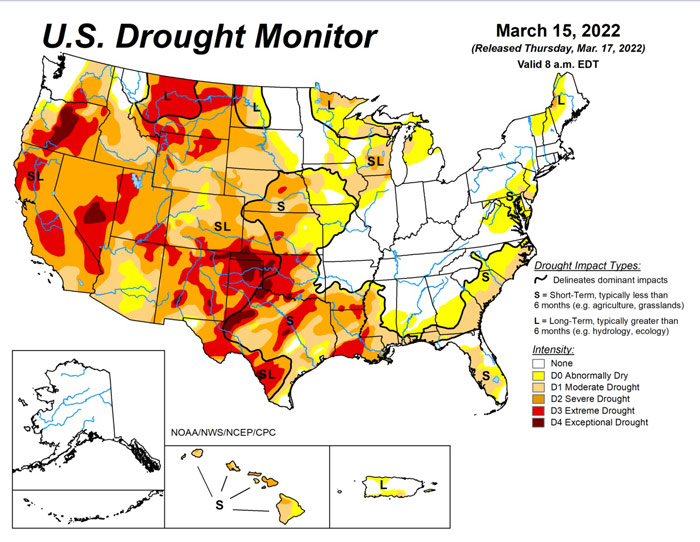
According to NASA, the U.S. is expecting a 100-YEAR LONG MEGADROUGHT.
It's already begun. Ask the farmers in California. They know.
Every survivalist knows that water is of critical importance. You NEED an independent water source that you can count on!
As an interesting "survival rehearsal" - imagine that you turned the tap on right now and nothing came out. How long would you last?
But what if there was another water source literally hidden in plain sight. That's right, I'm talking about the atmosphere!
The amazing thing about getting water from the natural moisture in the air... is that it is ALWAYS available.
This gives you real water security!
Learn more about how to tap into "Nature's secret water reservoir" and stay hydrated when TSHTF!
Watch the video:
� What Tinnitus Does To Your Brain Cells (And How To Stop It)
After 47 years of studies and countless brain scans done on more than 2,400 tinnitus patients, scientists at the MIT Institute found that in a shocking 96% of cases, tinnitus was actually shrinking their brain cells.
As it turns out, tinnitus and brain health are strongly linked.
Even more interesting: The reason why top army officials are not deaf after decades of hearing machine guns, bombs going off and helicopter noises...
Is because they are using something called "the wire method", a simple protocol inspired by a classified surgery on deaf people from the 1950s...
Most People Don't Have The Guts To Try This:
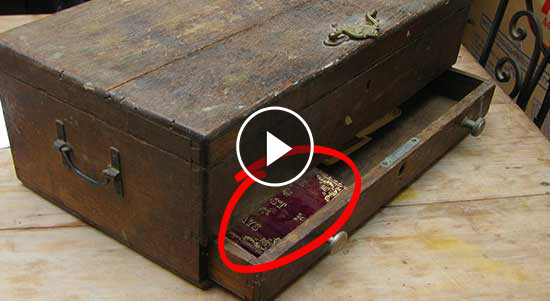
An amazing discovery in an abandoned house in Austin, Texas: A lost book of amazing survival knowledge, believed to have been long vanished to history, has been found in a dusty drawer in the house which belonged to a guy named Claude Davis.
Remember... back in those days, there was no electricity... no refrigerators... no law enforcement... and certainly no grocery store or supermarkets... Some of these exceptional skills are hundreds of years of old and they were learned the hard way by the early pioneers.
>> Click here to find out about them now
We've lost to history so much survival knowledge that we've become clueless compared to what our great grandfathers did or built on a daily basis to sustain their families.
Neighbors said that for the last couple of years Claude has tried to unearth and learn the forgotten ways of our great-grandparents and claimed to have found a secret of gargantuan proportions. A secret that he is about to reveal together with 3 old teachings that will change everything you think you know about preparedness:
>> Click Here To Watch The Video <<
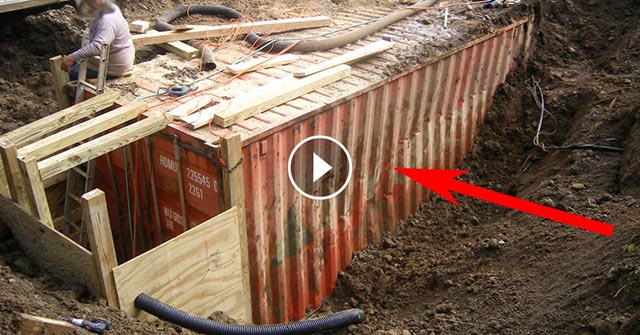
What REALLY Happens When You Bury a Shipping Container? (Hint: It's A Bit Crazy...)
Shipping containers are all the rage - but if you are thinking about buying one, you MUST watch this video first:
Do not, I repeat do NOT do what these lunatics did! Can you spot the "fatal mistake" they made?
There's a general belief that if you bury a shipping container you can create an awesome root cellar / storm shelter / survival bunker.
But is a shipping container strong enough to handle the pressure?
Watch the video to see what happens:
What Really Happens When You Bury a Shipping Container? (Click To Watch Video)

I Can't Help Showing This Off:
If you haven't heard of Claude Davis yet do yourself a huge favor and watch this video.
One of the smartest guys I ever had the pleasure of meeting, Claude set-up a unique prepping system that changed his life forever.
I already tried it myself and let me tell... you I was completely blown away... His surprising tactics could make your life easier and give you the peace of mind you deserve.
Don't just take my word for it... watch his short video and decide for yourself.
>> Click Here To Watch The Video <<

More Off-Grid And Survival Resources:


